Home Lab: Kali Linux installation (Attacker Machine)
 Kali Linx
Introduction
Welcome to the first installment of our cybersecurity home lab series! Whether you’re a student, a security enthusiast, or a professional looking to hone your skills, having a personal lab is crucial. It’s a safe, legal environment to practice ethical hacking, test security tools, and understand how systems are vulnerable to attack.
In this first post, we’re going to build the foundation of our lab: the attacker machine. We will be installing Kali Linux on Oracle VirtualBox. Kali Linux is the de facto operating system for penetration testers, and you’ll soon see why. It comes pre-loaded with an incredible arsenal of tools that we’ll be using throughout this series.
This guide is designed to be a step-by-step walkthrough, complete with screenshots to ensure a smooth installation. Let’s get started!
Prerequisites
Before we are set to install our attacker machine we must check if our current hardware can handle the virtual machines. So before the installation refer to the prerequsites for better performance.
Hardware requirements
Minimum Requirements
- Storage: 20 GB of free disk space
- Memory (RAM): 2 GB
- CPU: A dual-core processor (with virtualization enabled)
Recommended Requirements
- Storage: 40 GB or more of free disk space
- Memory (RAM): 4 GB or more
- CPU: A quad-core processor or more
As for operating system any operating system (Windows, Mac, Linux) is fine.
Downloadables
To get started, you will need to download two key pieces of software:
Oracle VirtualBox: This is the virtualization software that will allow you to run Kali Linux on your computer. You can download the latest version from the official VirtualBox website(https://www.virtualbox.org/wiki/Downloads).
Kali Linux ISO: This is the installation file for the Kali Linux operating system. You should download the official ISO file from the Kali Linux website(https://www.kali.org/get-kali/#kali-installer-images). Make sure to download the installer image and pick x86_64 version if on desktop.
- Important Note on Virtualization: For VirtualBox to work properly, you must have virtualization technology enabled in your computer’s BIOS or UEFI settings. This is typically an option called “Intel VT-x,” “AMD-V,” or “Virtualization Technology.” If you encounter an error when starting your virtual machine, this is the first thing you should check.
Installation
For the attacker machine installation open up virtualbox, and click on new to create a new machine.
 Virtual Box
And then once you have done that start by giving your machine a name, and a folder on a drive with atleast 30GB available storage space. Once it’s done select your downloaded Kali ISO image and set[Type: Linux, Subtype: Debian, Version: Debian(64-bit)]
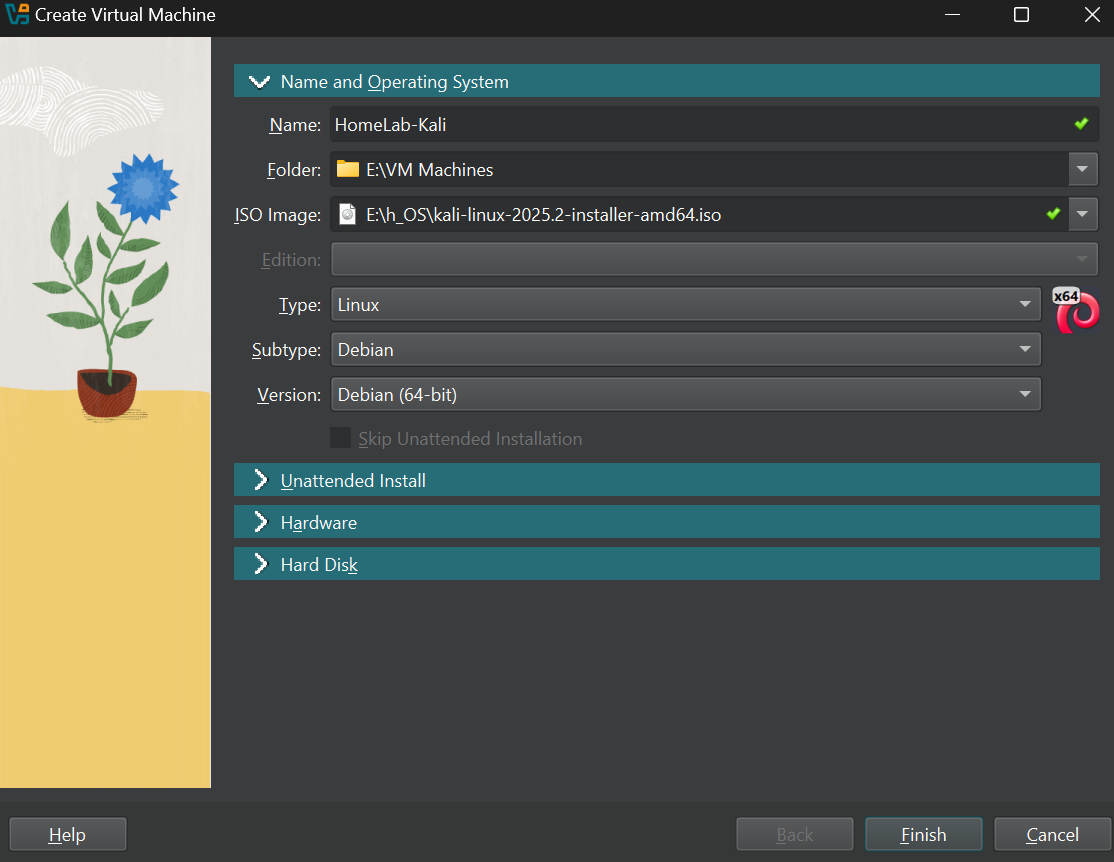 Naming the Machine
After this step head over to the Hardware section and allocate atleast 2048MB(2GB) RAM and provide atleast 2 cores of CPU
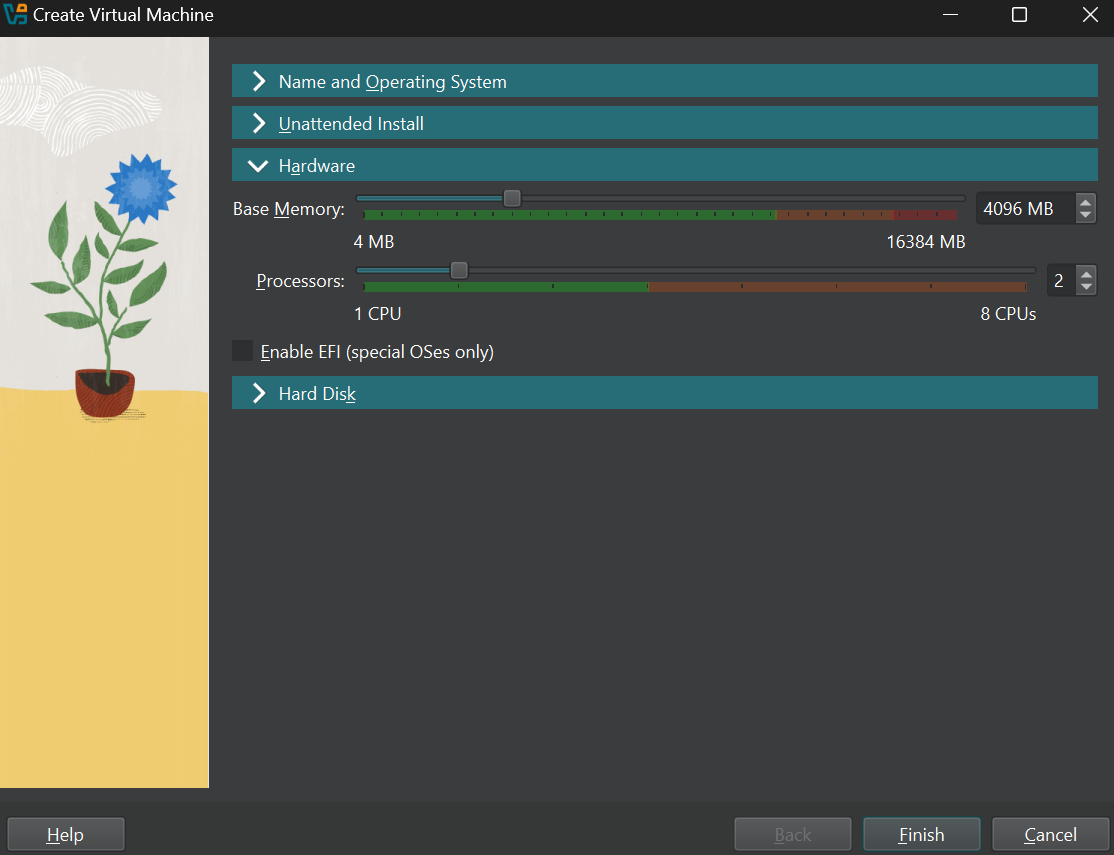 Resource
After the allocating hardware resources head to the hard disk section and provide atleast 20GB of storage space
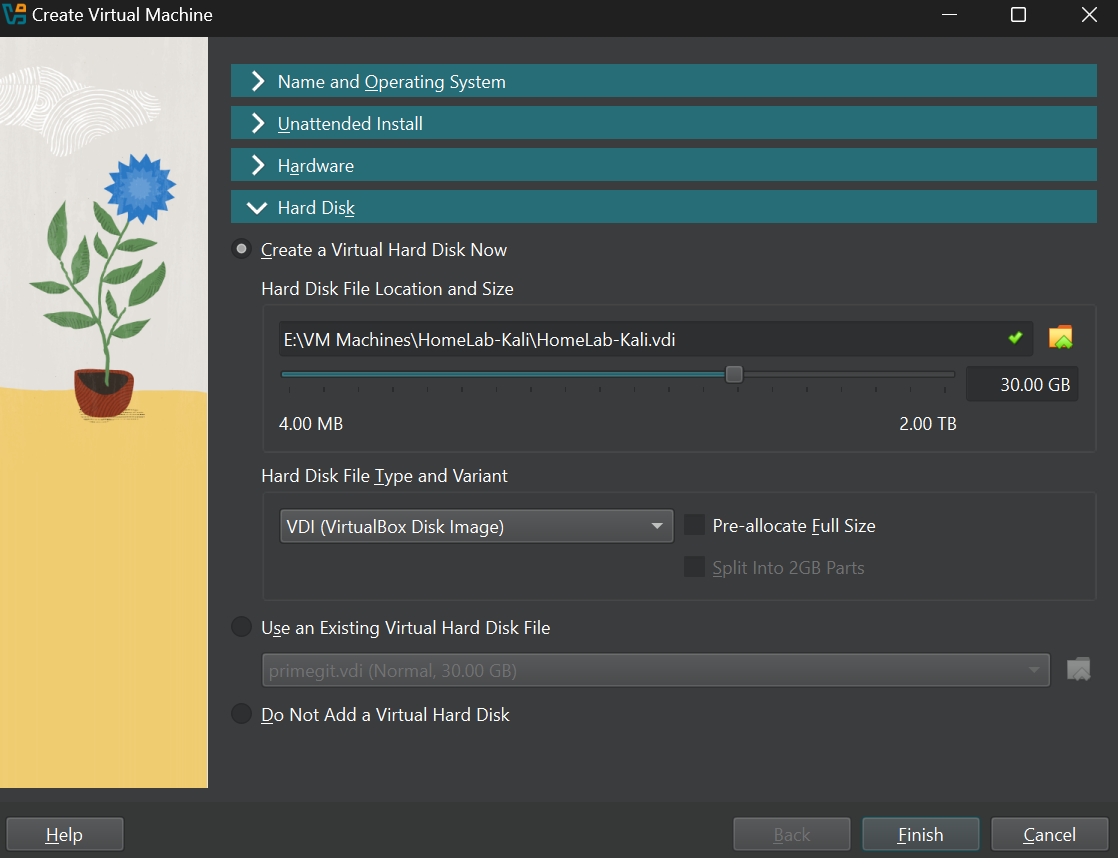 Harddisk
After allocating storage space run the created virtual machine
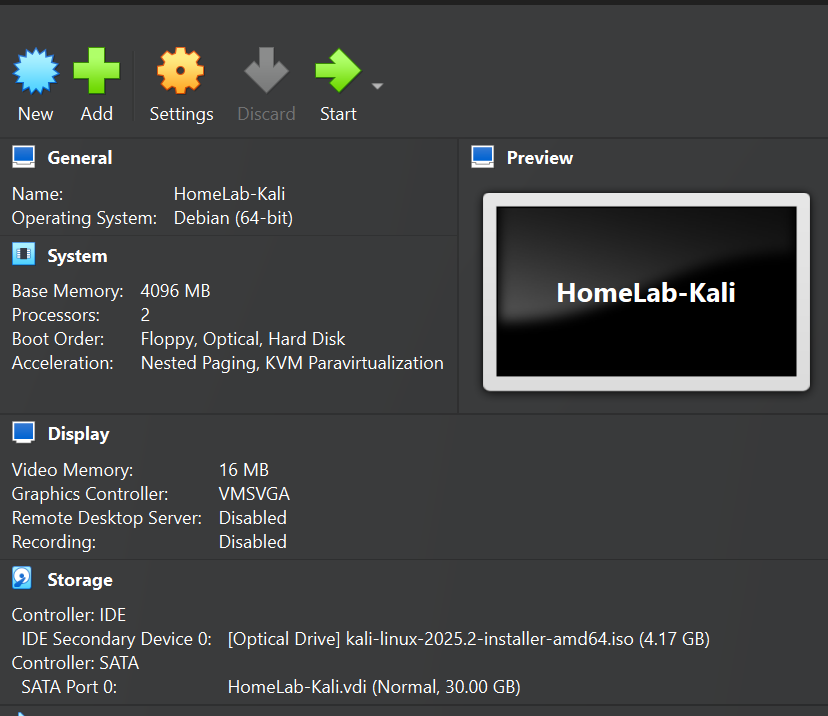 Machine Created
OS Installation
Once you run the machine you will see a screen like the one below. Now it’s time to install the OS, click graphical install to proceed
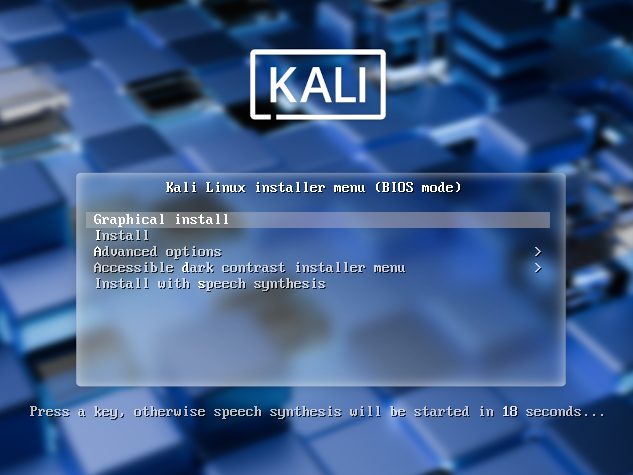 Graphical install
Now from here follow along with the simple installation process. Once the installation is complete your system will reboot and you will be asked to login.
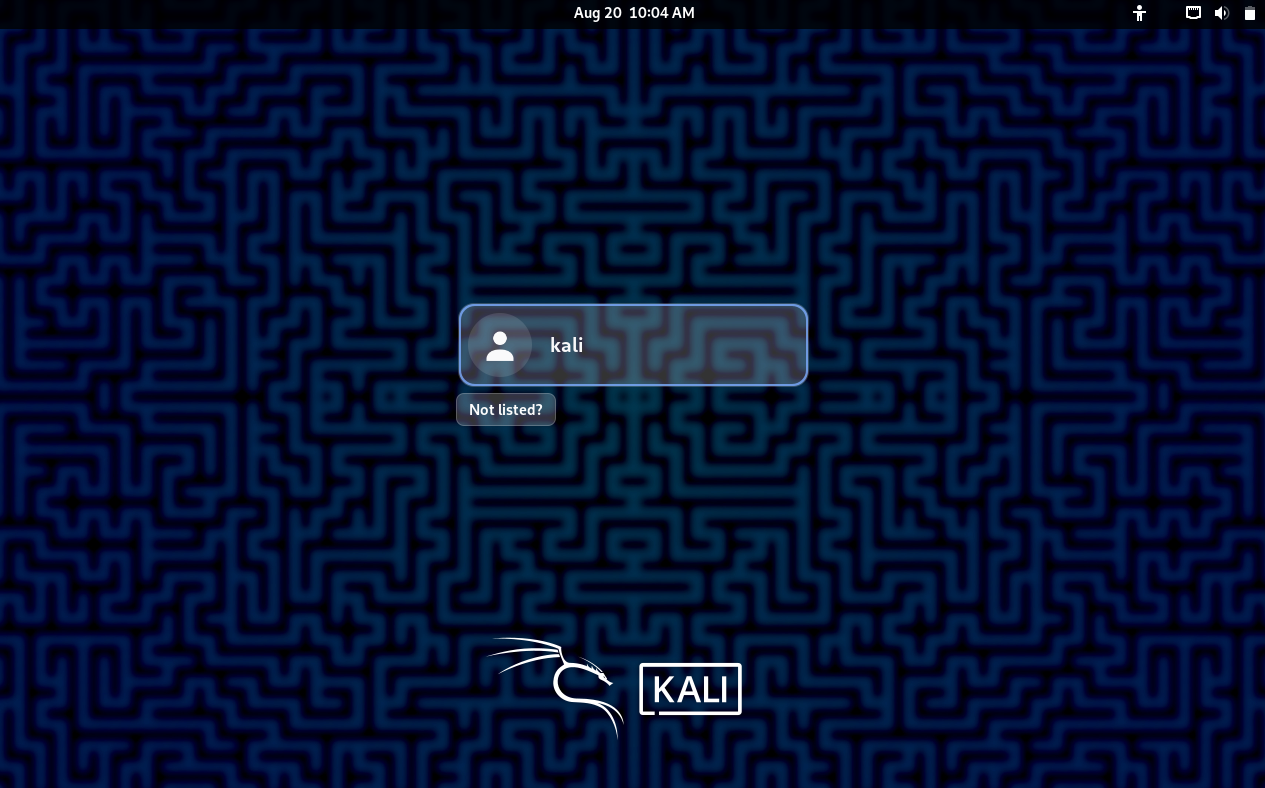 System installed
Once the installation is complete, Hold Host (by default it’s the right ctrl on windows) + Q to shutdown your machine
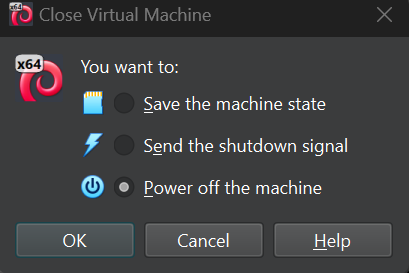 Power Off
Network configuration
Once you ave shut down your machine go to the settings to configure the machine to be in our own internel network (Dedicated seperated network from our home network)
Settings
Once you are in the settings go to the network tab
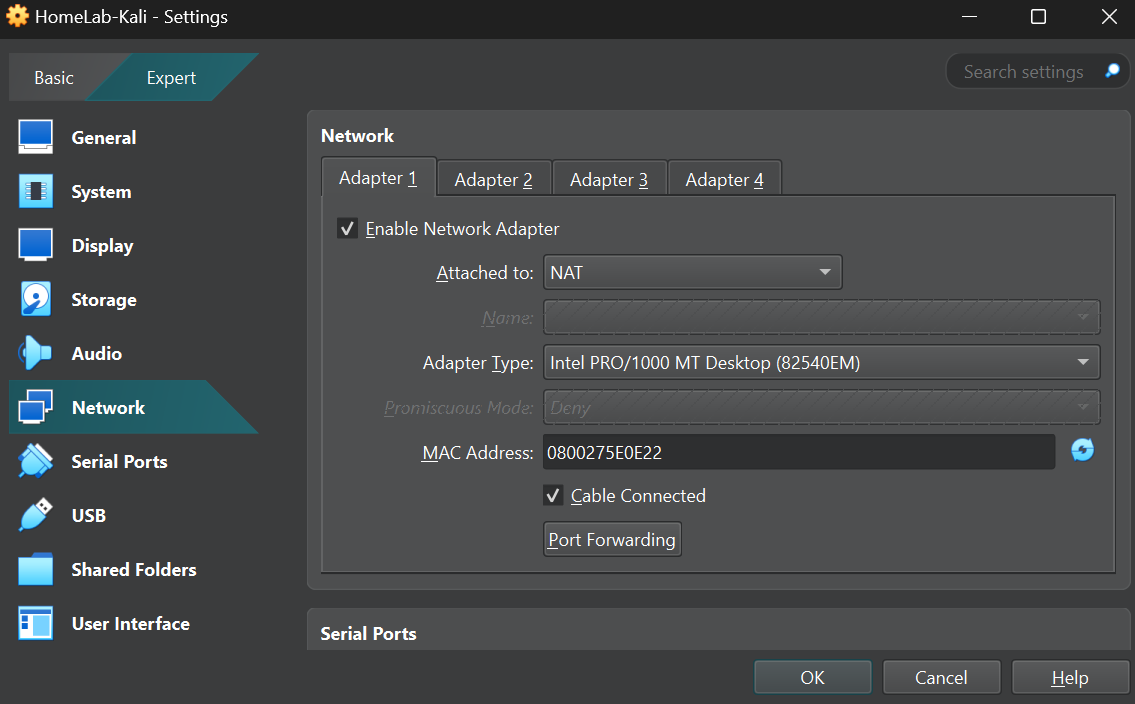 Network tab
Once you are in the network tab click on attached to and select internal network
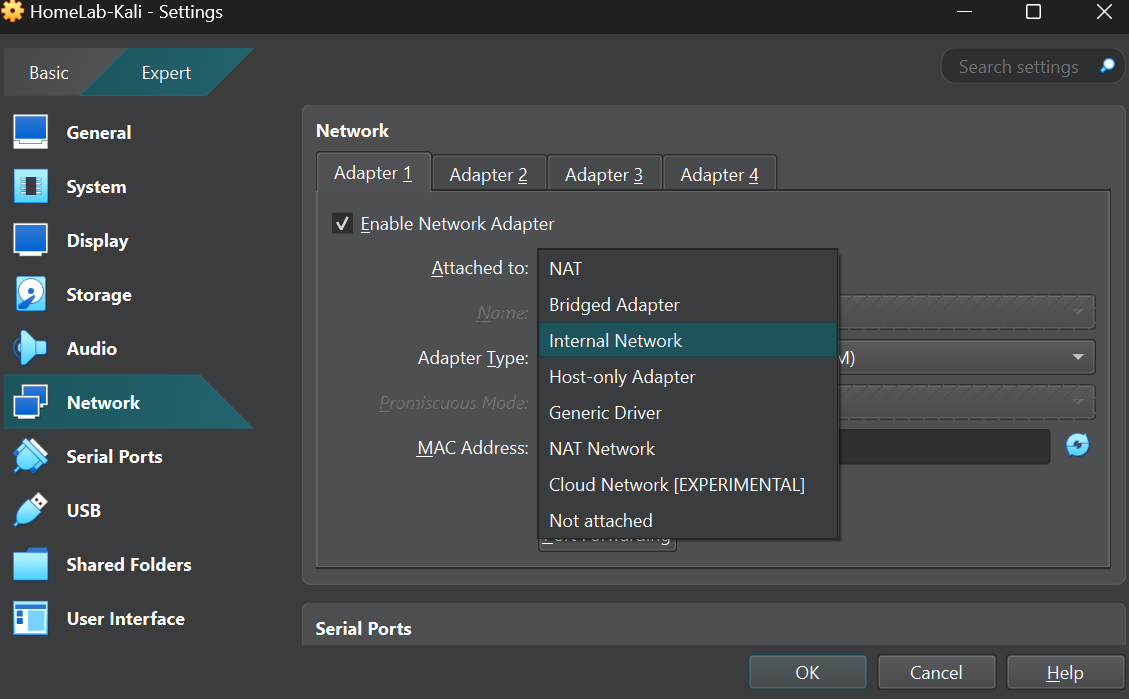 Internal network
Now give your network a name of your choice or if you already have one chose that.
IMPORTANT NOTE: Once you isolate your machine virtualbox by default does not provide it with an IP address since it is a completely isolated network there is no DHCP server for your machine to recieve an IP address. So you will have to assign an IP manually in the OS, or you could create your own DHCP server in this network like I did here.
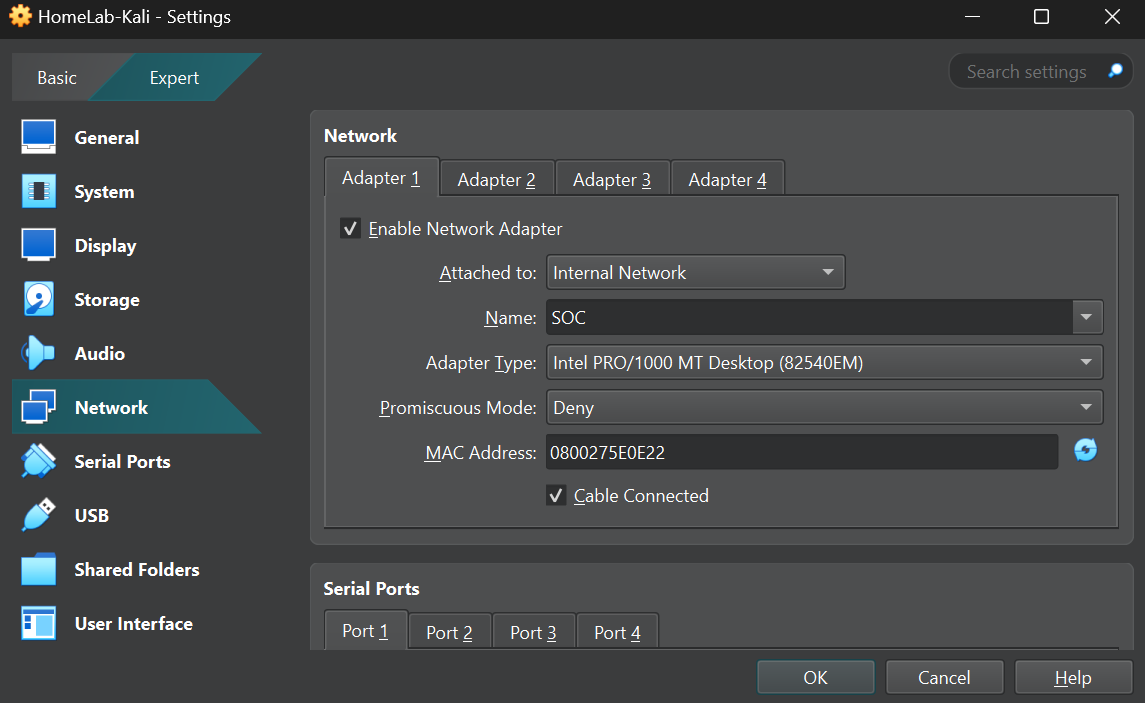 Internal Network
Conclusion
The successful installation of Kali Linux and its configuration on a private internal network marks a significant milestone in our home lab buildout. This foundational step provides us with a secure and controlled environment for all future exercises, adhering to the best practices of ethical hacking.
As we move forward, the focus will shift from building our offensive toolkit to establishing the targets and defensive mechanisms we will interact with. The Kali machine we’ve just created will be our primary tool for these activities.
Our next post will guide you through the setup of Metasploitable 2, a vulnerable virtual machine that will serve as our primary target for penetration testing. This will not only allow us to immediately apply the skills we’ve gained but also begin generating the logs and security events we’ll need for our Security Operations Center (SOC) project. These logs are the raw data that a SIEM (Security Information and Event Management) platform uses to detect threats.
Thank you for joining me on this journey. I look forward to seeing you in the next post.